Veggie Sushi

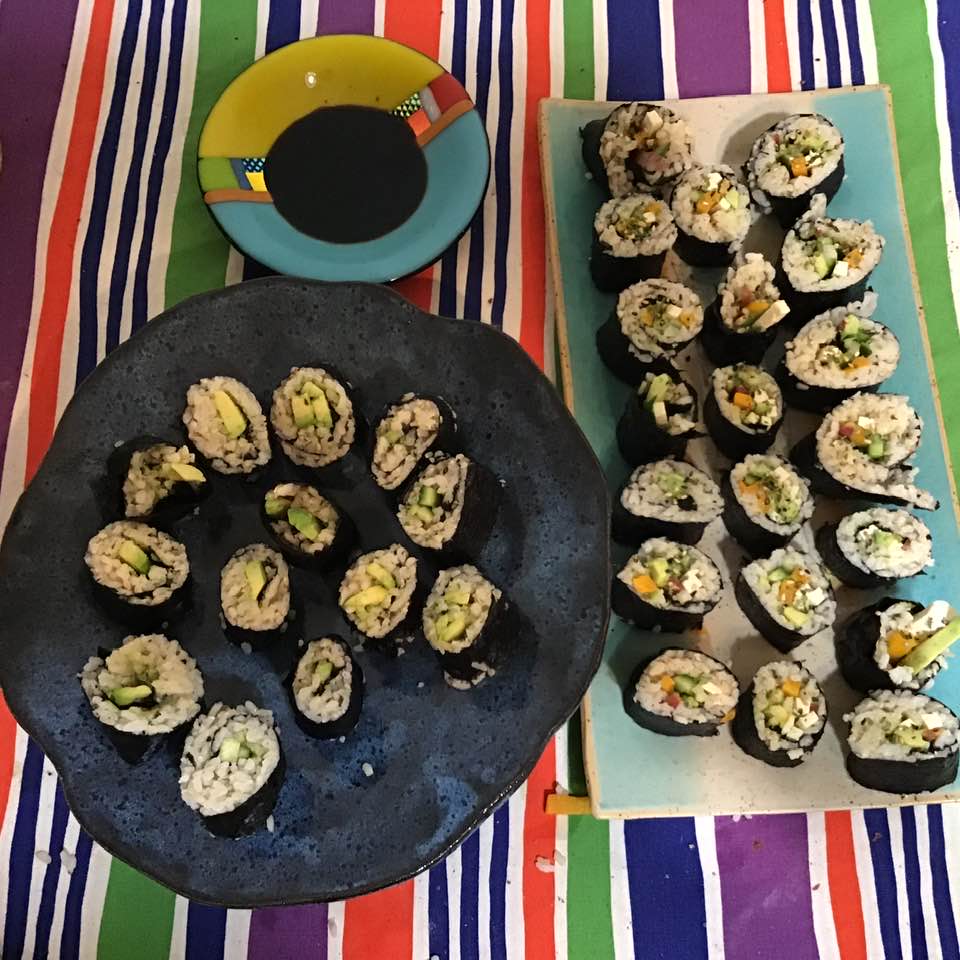
I was going to write a post about the latest Plata hearing, vaccines, and the sad stories that the Davis Vanguard has been uncovering (great journalistic job, guys!) but my heart is heavy, so we rallied our spirits by having family sushi-making night. I only wish we could share the tray with everyone we are in communication with, including families, currently incarcerated folks, formerly incarcerated folks, frontline health workers… after all ***this*** (insert expansive hand motion here) is over, perhaps we can all get together as a community for a potluck?

In the meantime, I’m extending all of you an invitation to our upcoming symposium about mass incarceration and the COVID-19 crisis. Attendance is free, but you do have to register to participate. And hey, we give MCLE credits!

Re the sushi: it’s pretty easy if you have the right ingredients on hand. Here’s what I use:

  • 2 cups Sukoyaka Genmai (the best gently milled brown rice, which the wonderful Tanaka Sensei introduced our family to)
  • 4 tbsp mirin
  • 1 tbsp vegan furikake (we have some but you can make your own)
  • 1 cucumber
  • 1 carrot
  • 3-inch cube of butternut squash
  • 1 avocado
  • 1/4 block of Hodo Soy tofu
  • 1 package nori sheets
  • sushi rolling mats
  • saran wrap

Cook rice in instant pot or rice cooker. Get out of cooker, let cool to room temperature, then mix with mirin and furikake.

While rice is cooking, slice vegetables into very thin matchsticks. The butternut squash can be cut thinly and then baked until soft.

Place a bowl with tap water near the rice, veg, and sushi mat. Cover the sushi mat with a piece of saran wrap, then put a nori sheet on top. Moisten you hands in the water bowl; take a few big spoonfuls of rice and layer them, patting them down on the nori (1/4-inch thickness) and leaving about 2 inches at the end. Then, toward the beginning, place the vegetable sticks of your choice.

There are lots of tutorials on how to roll sushi–anyone will do. The lesson I learned was not to overfill. Use some water on a fingertip to seal.

Take your best knife, moisten it with tap water, and resolutely slice up the roll into little maki sushi (each about an inch long.) Sprinkle furikake or black sesame if desired. Enjoy!

Collard Wraps

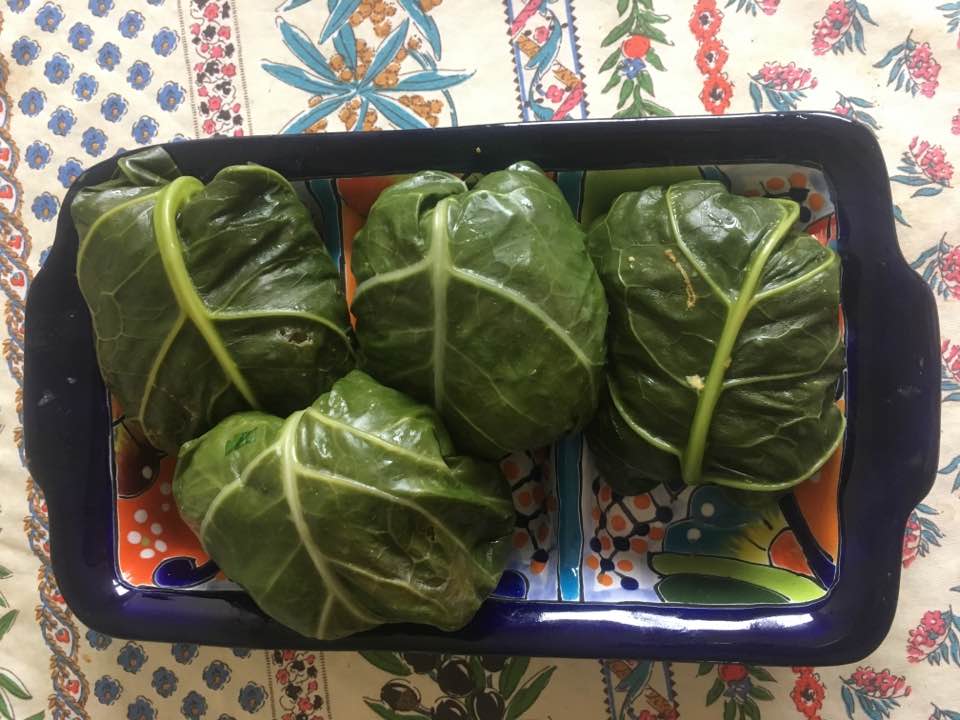
Today we’re grilling vegetables in the yard! It’s always a fun thing, and our selection this time includes cauliflower, onions, mushrooms, potatoes, and brussels sprouts. On the side, we’ll be eating these guys: collard wraps stuffed with a lovely light salad.

Wrapping with a leaf is a skill, but you get better at it the more you do it, and collard leaves are excellent for this purpose because they are sturdy and, at the same time, pliable. You trim their stem and steam them lightly and they’re ready to go. It’s a nice, hand-held way to serve a salad, and might induce salad-phobic people to indulge.

Wraps
4 collard leaves

Salad
1 package kelp noodles
1/2 a regular cucumber or 1 Persian cucumber (preferred)
4-5 radishes
2 tbsp chopped green onions
big handful cilantro
1 small avocado or 1/2 big one

Dressing
juice from half a lemon
1 tbsp peanut butter
1 tsp soy sauce
1 tsp liquid smoke
chili powder to taste

First, mix all dressing ingredients and set aside to combine.

Then, place kelp noodles in bowl and cover with boiling water. Let stand for a few moments.

While the noodles are rehydrating, thinly slice all vegetables. Drain noodles and mix with vegetables. Pour dressing on top and gently mix to combine.

With a small, sharp knife, gently trim the stem off the collard leaves, without tearing the leaf itself. Place trimmed leaves in a steaming basket (or in your Instant Pot) and steam for a few minutes. Remove from heat source and rinse leaves gently with cold water.

Place a collard leaf on a cutting board, with the stem side toward you.. Place a few hefty spoonfuls of salad at the center of the leaf. Fold the stem side over the salad, away from you, and the opposite end toward you. Then, fold the sides as well. Flip the wrap with the seam side pointing down and give it a gentle squeeze. Proceed until all leaves and salad are used. Place on a tray, seam side down.

Vegan Pupusas

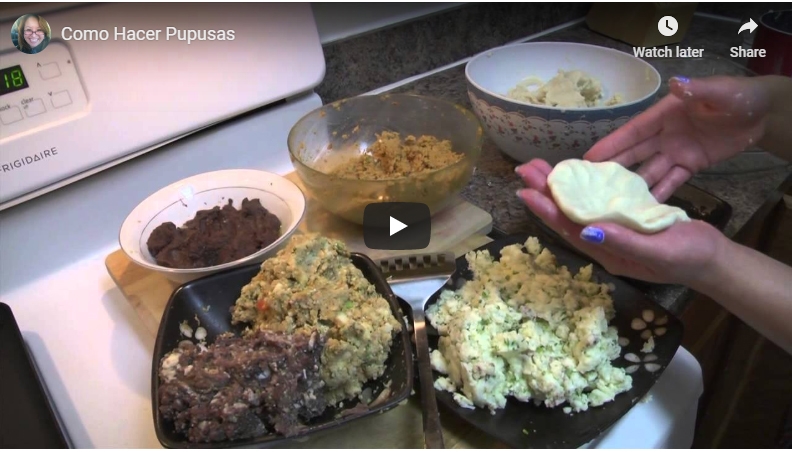
This blog’s subtitle refers to our neighborhood, Mission Terrace, in which you’ll find lots of wonderful Mexican and Salvadorean restaurants–and more than a few that serve food from both cuisines. If you have masa on hand, you can make both tortillas and their Mexican cousin, pupusas–a nice, fluffy pancake stuffed with nice filling. Our neighbors on Mission Street make theirs with dairy cheese, so I decided to try my hand at my own version and stuff mine with cashew cheese. I made two varieties: cheese and beans and cheese and loroco (a green bud sold at Mexican supermarkets and grocery stores.) Both came out delicious.

My technique is still pretty shoddy, but even the failures are tasty. For a real expert’s guide, I give you Lupita.

How to make the vegan fillings? I used my soft cashew cheese and mixed some with beans and some with loroco, in lieu of the fillings Lupita uses. Note that it’s easiest to maintain the consistency of the pupusa if the masa and the filling have roughly the same consistency. Buen Provecho!

Flavored Macadamia Cheeses

You guys, I am beside myself with enthusiasm about Noa Shalev’s vegan cheese course. If you’re a Hebrew speaker, cough up the 350 NIS and join the course. It’s so worthwhile. Noa is a fountain of knowledge about fermentation and culturing and about nutrition in general, and her recipes rock!

I’m amidst the process of making hard cheeses, which Noa advises to make from macadamia nuts. I made two kinds: cheeses that I hope to age in the dehydrator and then in the fridge, so that they develop “body” and a rind, and slightly softer cheese balls rolled in spices.

I hesitate to reproduce the recipe, because I really want you all to take this course, but I’ll just mention that Noa ages her cheese with probiotic capsules, which is a convenient method, especially if you don’t have it in you to make rejuvelac or squeeze sauerkraut juices.

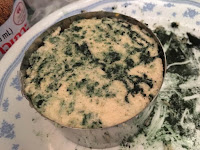
This bleu cheese is made with spirulina, and one of the things I’ve learned is that a little spirulina goes a very long way. That’s not a tiny cheese, and I put half a teaspoon of spirulina in it. It brings a bit of that moldy taste into the cheese and looks like the original. I’m quite thrilled with it!

This cheese is my effort at a yellow hue, which I achieved with turmeric. I also threw in some cumin and coriander, because I really like that combination. Next time I’ll do this with jalapeño bits, I think.

Once these cheeses harden in the fridge, I’ll put them in a dehydrator for 24-48 hours, and then I’ll age them further in the fridge. Delayed gratification.

These ones we can eat right away: cheese balls with all kinds of spices and flavorings. Here are my combinations:

ras-el-hanout
za’atar
zchug
chimichurri
nigella seeds-onion
oregano-garlic
sumac-cumin-coriander

The Merits of Israeli Breakfasts

Breakfast is a touchy subject. It appears that even folks who are ready to experiment with lunch and dinner don’t want to confront something strange and unfamiliar when they get up.

While my breakfast preferences have changed over the years, there are still items that surprise me when I travel or stay with friends. The Large American Brunch, for example, completely threw me off when I came to Berkeley. Fried potatoes? And toast? And meat? For breakfast? I couldn’t believe people would want to eat that (even if it’s served at a good diner, rather than in an abominable Egg McMuffin). My roommate from Taiwan enjoyed a big plate of pork and fried greens at 7am, which was delicious for her and very odd for me. And, when scheduled to give talks in England, Oxford and London hotels insisted on serving fried tomatoes (why spoil a good thing?) and mushrooms, and beans. All these choices apparently work perfectly well for folks who are used to them, but me – I couldn’t cope with those items.

My usual morning fare includes a cup of hot water with lemon, followed by fresh fruit; I find it works really well for me and gives me a nice start. But when going out or inviting people in, we often eat the traditional Israeli breakfast, comprised of the following items:

– eggs
– cheese of various kinds
– a big vegetable salad
– bread
– tuna or some smoked fish (optional)
– orange or grapefruit juice
– coffee or tea

Now, Israeli hotels are quite famous for their breakfasts, which include a variety of additional items: fruit, yoghurt, various muesli, granola and cereal options, hot cake, salty and sweet pastries, etc. Even less exciting venues often add good quality tchina. But the egg, cheese and salad are the key components.

What’s so good about an Israel breakfast? Obviously, considering that most people eat bread in the morning with their eggs and cheese, it offers a combination of carbs and protein. Count the juice in, and you’ve got some more sugar and vitamins. If one is into food combinations, the best and safest way to enjoy this is to focus on the eggs, cheese and vegetables.

Thinking about this, the Israeli breakfast is not less strange than other breakfasts. Its appeal to Israelis is in its familiarity, and to tourists – in its novelty. Most people are not used to raw vegetables on their morning plates.