Growing Mushrooms

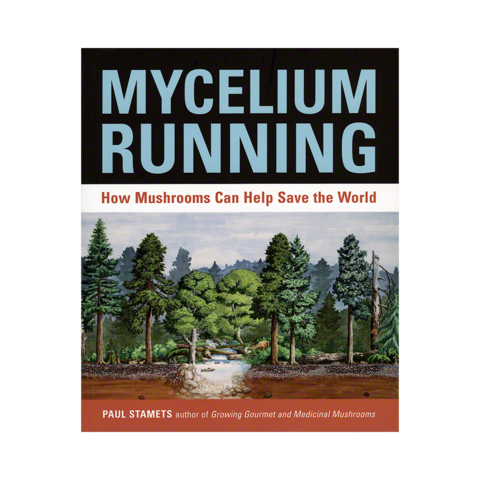
These are pink oyster mushrooms that we’ve grown at home, from mini-farms supplied by Far West Fungi. I became interested in mushrooms through my readings on deep ecology and interconnectedness, and especially through reading and enjoying Paul Stamets’ wonderful book Mycelium Running. Stamets, who is marvelously knowledgeable about the fungal kingdom, discusses mycelial mats and their important roles in fostering communication and collaboration between different species, such as trees and animals. They also play a crucially important role in composting and renewal.

After reading the book, I knew I had to see for myself what it was like to experience these marvelous organisms up close, and so, I ordered a few mini-farms and got to work. The most important thing about growing mushrooms is the location: they like indirect light and cold, and they love being humid. The mini-farm suppliers know what’s what, so I followed the instructions to the letter and got lots of wonderful mushrooms out of the kits.

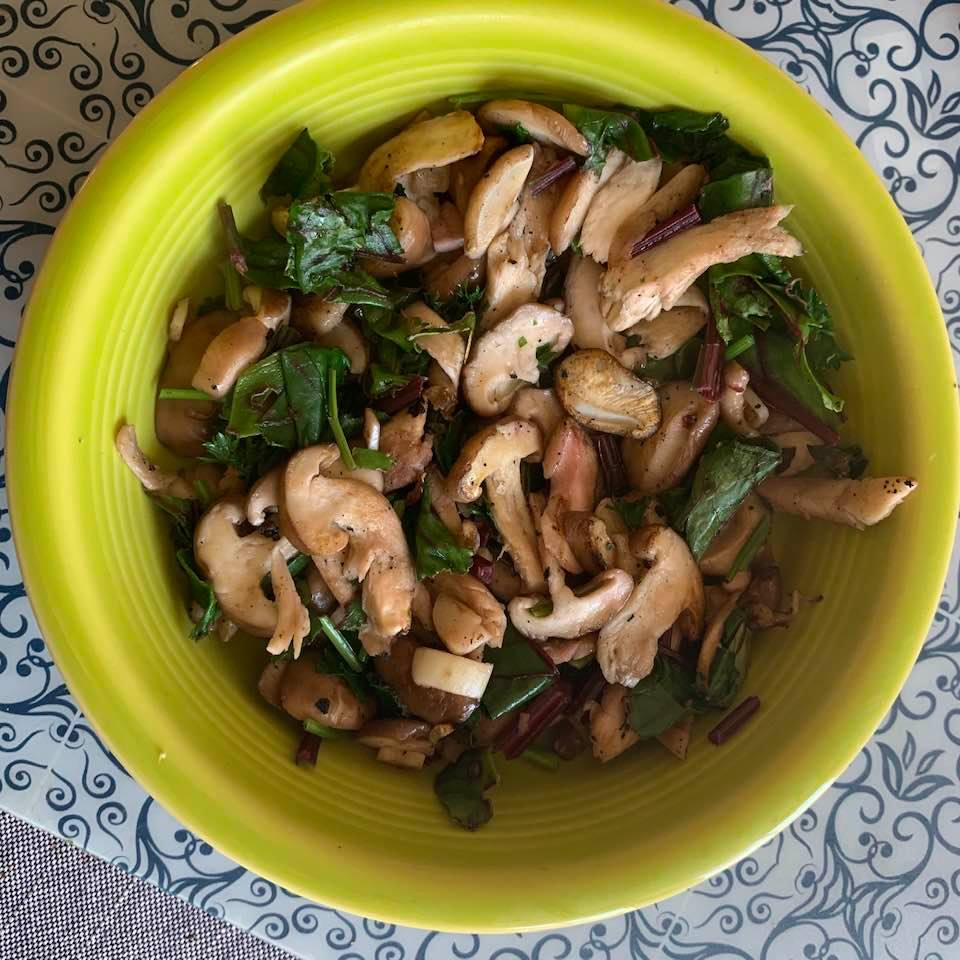
Here are some of the mushrooms we’ve grown. The shiitakes were wonderful and juicy when picked, and I simply sautéed them with some garlic and greens.

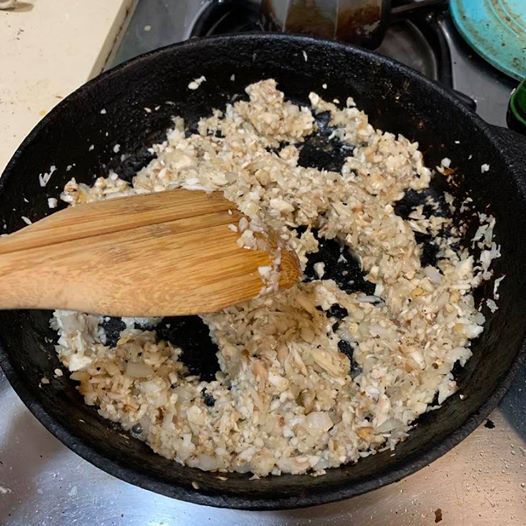
I used some of the shiitakes, with the tree oyster mushrooms, to make a marvelous filling for my tortellini. The recipe is here.

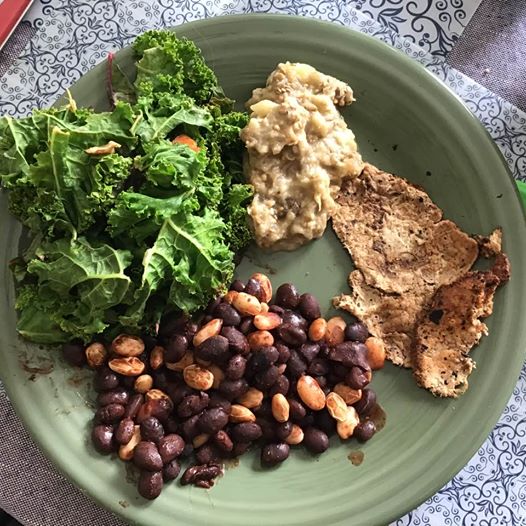
And I made beautiful steaks out of Lion’s Mane mushrooms. There’s a technique involved, but it’s not hard. You heat up vegan butter in a pan, place the mushrooms in, and then flatten them with a heavy pan on top. After a few seconds, you flip the mushrooms and season them (I used Marin jerk.) You then flip again, season again, and press again. A few flips and presses yield something remarkably juicy and meat-textured, which you can see on the right of yesterday’s lunch.

The fresh mushrooms are wonderful to eat. They have a more powerful aroma than store-bought mushrooms and a bit of a “gamy” feel–it definitely conveys the message that they are neither plants nor animals. Most importantly, the mushroom adventure has fostered a lot of respect and admiration for these magical organisms and their important ecological role. I very much hope we’ll get a few more crops out of the substrata we have!

Shavuot

Check out our awesome Shavuot table! We just finished hosting our Shavuot party, which is apparently not a huge deal in the United States. I suspect there are two reasons: its lack of proximity to a heavily commercialized Christian holiday (this, after all, is how Hanukkah became such a big deal) and its strong ties to the land (it’s a harvest holiday.) In kibbutzim and moshavim there’s often a nice parade of first fruits of the year (including the babies born that year) and elsewhere in the country people celebrate with a dairy meal. Why dairy? Apparently, the word חלב״ chalav” (milk), in Jewish numerology, adds up to 40, and Moses was on Mount Sinai 40 days.

I took the challenge seriously and put together a holiday party for our friends featuring a whole array of vegan cheeses, which I learned how to make in Noa Shalev’s awesome vegan cheese course (you should take it, so cough up the 350 NIS and do it.) A lot of improvisation went into this – my cheese flavors are original inventions, save for the spirulina one, and my raw cashew cheesecakes are variations on the lemon-lavender cake I made a couple of weeks ago following Noa’s recipe. This time I made mango-basil cake and strawberry-thyme cake. All I did was replace the flavoring. I glanced at one of my new books, The Vegetarian Flavor Bible, to match fruit and herbs, but I find that I already have a pretty good gut feeling about combinations.

Anyway, from bottom to top: green salad with avocado, nectarines, and strawberries, dressed in quince vinegar from Nan at Vermont Quince; spiralized salad of cucumber, carrot, beet, and radish, dressed in a mix of good mustard and Nan’s quince salsa; cauliflower ceviche; “chevre” cheeseballs flavored with nigella, chimichurri, za’atar, zchug, and ras-el-hanout; leek-mushroom quiche with chickpea base; vegan lasagna with tofu ricotta: four hard cheeses, flavored with spirulina, turmeric-cumin, miso, and garlic-zchug; breads and crackers; and the aforementioned raw cakes.

A good time was had by all!

Adventures in Soy: Soymilk, Okara Cake, and Vegan CrabCakes

Being unwell at home has its advantages: boredom breeds big kitchen projects. Happily, I was well enough to mill about the kitchen, and we had a package of dry soybeans lying about.

I started off by making soymilk, for the first time ever. I had two recipes on hand: one from The Homemade Vegan Pantry and one from The Tofu Book. The former advocates boiling the beans for one minute and the latter instructs to soak them overnight. Since I wanted to go through the whole process from start to finish that day, I went with the former approach.

Making soymilk is a multi-step approach. It starts off with boiling a great quantity of water in a big pot. Then, the beans are added to the boiling water and boiled for one minute. The pot is then removed from the stove and left to cool for 30 minutes.

After 30 minutes, I drained the beans. I put some of them in my blender with fresh water and blended to the point of creating a thick slurry. I then poured the slurry into a nut milk bag over a big bowl, squeezing with all my might. The milk dripped into the bowl; okara, the by-product of soymilk, was left inside the bag. I repeated the process in batches, until all soybeans were blended and milked. I ended the process by simmering the milk for ten minutes without letting it boil. Contrary to the book’s promise, the soymilk retained much of its original, beany flavor, which some absolutely love. I’m not very fond of it, but it can be partially masked with some vanilla extract. I might make tofu out of the milk I have, but I don’t think I’ll make this process a habit. Next time, I’ll try the soaking method, but I suspect it’ll yield a similar outcome.

The silver lining of the entire enterprise was the okara; I was left with so much of it that I packaged and froze four cups. I was left with enough fresh okara for two feats: a dried fruit cake and Miyoko Schinner’s “fab cakes”, which were a resounding success.

The recipe for fab cakes is in The Homemade Vegan Pantry; it requires a lot of ingredients, but fortunately I happened to have odds and ends of everything at home. I encourage you to buy the book and try this recipe. It’s fantastic. The cake itself is made mainly of okara and silken tofu, so it’s rich in protein and fiber, and it also contains quite a bit of delicious nori. Having missed crab cakes quite a bit, I was delighted to have such a delicious substitute.

The recipe for dried fruit cake is my own, so I’m happy to share it:

1 cup whole wheat flour
1 cup fresh okara
1 cup boiling water + 3 tbsp room temperature water
1 cup mixed dried fruit (raisins, cranberries, apricots, figs)
4 tbsp flax seeds
2 tbsp brown sugar (and I think this would come out fabulous even without sweetener)
1/4 cup olive oil
1 tsp vanilla extract
1 tsp baking powder
1 tsp baking soda
1 tsp cinnamon
1 tsp nutmeg
1/2 tsp hawaiiej for coffee (but I think you can do without)
1 pinch salt

Heat oven to 350 Farhenheit.
Pour cup of boiling water over dried fruit and leave aside to plump a bit.
Grind one tbsp of the flax and mix with three tbsp water. Leave aside to become gelatinous.
In a big bowl, mix oil, sugar, and vanilla. Add flax and dried fruit (with the liquid) and mix some more. Then, add all dry ingredients and mix just until combined. Pour into pan–I used my trusty silicone bundt cake pan–and bake for about 40 minutes, or until a knife plunged into the middle comes out dry and clean.

I’ve done some more reading on okara. It seems that you can easily substitute about 1/2 of the flour in almost any baking recipe with okara, though some websites prefer the use of dried to fresh. Since I used fresh okara, I can attest that it doesn’t harm the final product; the cake came out marvelous, fluffy and moist, and makes a delightful breakfast treat. What with this and the fake crab cakes, I feel like I got a lot out of my soymilk-making adventure–including newfound appreciation for commercial unsweetened organic soymilk, which I plan to continue buying most of the time!

Pickled Turnips

Our CSA adventures continue to reward us with great produce. We’ve expanded our box from 1-2 people to 3-4 people, even though there’s only two (humans) at home, because we eat a lot of vegetables–they constitute the bulk of our diet–and because we frequently have friends over for dinner.

When we asked for turnips, though, we didn’t know we were going to get TWELVE! Turnips are wonderful vegetables, but even I was stumped as to what to do with so many within a week. Enter my beloved friend Dena and her pickled turnip recipe. Dena is one of the overlords at the wonderful Israeli pickling, fermenting and curing blog Feedhamutzim, and always has terrific recipes that involve bacteria friends.

I changed the recipe a bit, because I didn’t have some of the ingredients, and ended up doing this:

 8 turnips
2 golden beets (if you use red beets, the turnips will turn a pleasing pink color. I simply didn’t have any at hand.)
6 garlic cloves
2 tbsp mustard seeds
2 tbsp peppercorns
3 tbsp salt
2 lettuce leaves
2 mason jars, slightly larger than normal (I can see making this in one giant jar. It’s an art as well as a science

Slice turnips and beets thinly and pack into jars. Add 3 garlic cloves, 1 tbsp mustard seeds and 1 tbsp peppercorns, as well as 1.5 tbsp salt. Cover with water to the rim. Place a lettuce leaf right at the rim of the jar and screw the lid on tightly. Let sit for three days and you’re home free.

These are a lovely addition to any salad or dish, and are especially pleasing with falafel.

Sprouting Lentils


I’ve posted here before about sprouting, and thought that some might appreciate a step-by-step guide of the process. This is a batch of lentil sprouts that I started yesterday night. I soaked them overnight, and this morning have rinsed them in fresh water and placed them in a colander over a pot. You can’t see any little tails yet, but the lentils are already very soft; the sprouting process has begun.

The Olives: Part Three

Hiya, all!

This final post in the “olives” series is also my entry for my dear, dear pal Barbara’s spice challenge (“going back to school” and learning about spices). Now that the olives are ready – and that bay leaves had such an important part in creating their beautiful flavor – let’s learn a tad about them.

From the McCormick Spice Encyclopedia:

Bay Leaves or Laurel, are the dried leaves of the evergreen tree, Laurus nobilis. The elliptically shaped leaves are light green in color and brittle when dried. They have a distinctively strong, aromatic, spicy flavor. Bay Leaves is the approved term for this spice, but the name “laurel” is still seen frequently.

In Ancient Greece and Rome, bay leaves and branchlets were used as wreaths to crown their victors. Champions of the Olympic games wore garlands of bay leaves. Our word “baccalaureate” means “laurel berries” and signifies the successful completion of one’s studies. It alludes to the bay wreaths worn by poets and scholars when they received academic honors in ancient Greece.

Whenever I make soup, pasta sauce or anything that needs to taste rich, I add a leaf or two. They somehow add that little extra punch, and it’s hard to explain what, exactly, it is they do, but somehow they make any less-than-perfect soup, chowder or sauce, perfect.

Since bay leaves are quite strong in flavor, they are to be used in small quantities and discarded before eating. In the process of making olives, we added one or two leaves to each of the jars.

The picture really doesn’t do the olives justice. They came out delicious, and I suspect if we give them a few more days they’ll be even better. So, here’s the now-tried-and-true way to do it:

1. Upon getting your olives off the tree, soak them in clean water, for three days. Change the water daily. Optional but really improves the olives: make a small cut in each of them with a knife, or pound them with a heavy object so they are cracked. They will be tastier and absorb the marinade better and faster.

2. On the fourth day, get nice, clean jars and the following ingredients per 1 kg of olives:
* 1 red hot pepper
* 1/2 lemon
* 1 tablespoon black pepper, unground
* 1 tablespoon mustard seeds
* 1 bay leaf
optional ingredients:
* 1-2 garlic cloves sliced in half
* 1 rosemary twig

3. Make a water-salt solution – 1 heaped tbsp salt to 1 cup water. You know it’s salty enough when an egg placed in the solution floats up.

4. Place the olives and the spices in the jars:
* First, put a couple of red peppers and two lemon slices in the bottom.
* Cover with a thick layer of olives.
* Sprinkle some pepper and mustard on top.
* Cover with olives.
* Place bay leaf and additional stuff, if you want to.
* Cove with olives.
Repeat until jar is full.

5. Then, pour on top of the olives the salty solution, all the way to the top.

6. Seal with a layer of olive oil and/or wine vinegar.

7. Let stand in a cool, dark place, for about two weeks.

8. Find out when your friends’ birthdays and anniversaries are, so you can give them olives. Don’t have any olives? Let us know and we’ll send them some!

The Olives: Part Two

What we see here in the picture, folks, is our new “olive cellar”, containing – yes – FIFTEEN jars of olives!

We used different recipes for the olives. About half of them are what we call here zeitim dfukim – olives that were broken so their pickling will be more thorough and take longer. The other half we left whole. The solution is salt water, and the spices include fresh lemons, spicy red peppers, black peppers, mustard seeds, and occasionally garlic and rosemary and red wine vinegar. We still don’t know how they are going to come out, but we’ll keep you posted.


What we see here is a jar with layers of olives, lemons, peppers etc. Here’s the way we did it:

1. We let the olives sit in water for four days, changing the water every day.
2. We washed the jars well (some folks even boil them to sanitize)
3. We cut about one lemon per jar into eight pieces. We peeled some garlic cloves and made a small dent in them with a knife. We prepared bay leaves, black unground pepper, mustard seeds, and rosemary twigs next to the spicy red peppers, lemons and garlic.
4. We placed two or three lemon slices and a hot pepper at the bottom of the jar, then layered with olives.
5. Then, we placed one or two bay leaves (per jar) and some of the other spices, depending on what we wanted the jar to be like. Then put some more olives, and so on and so forth.
6. With some jars, we added about a third of a cup good quality wine vinegar.
7. We placed an egg inside a large pot and filled the pot with water (the egg sank to the bottom). We started adding salt – about 1 tablespoon per cup of water – and mixing it with the water. Whoa! The egg started floating! That meant the solution was ready.
8. We filled the jar with salt water, on top of the olives.
9. We “sealed” the olives with a thin layer of olive oil on top.
10. We closed and sealed the jar, and put it in a dark, cold place (poor olives).
Now we wait.
And here at the blog, it’ll be back to our previously scheduled programs.

The Olives: Part One

My gentle readers have probably noticed how useful olive oil is in our Tel Aviv kitchen; there’s hardly a recipe without it. Olives, and olive oil, are an inseparable part of the Israeli landscape, and often become the symbolic subjects of political struggle over the land.

There is a large, ancient olive tree in my parent’s house, which yields “Syrian olives” of the small and bitter variety – the very best, in my opinion. This year the tree was full of fruit, and we decided to pick it and pickle it. My grandpa tried to dissuade us of the plan. A few years back, he had harvested much of the tree, and ended up pickling twenty enormous jars of olives, thinking he would give them out later as gifts. Hah! After a few weeks, no one in their circle of family and friends could bear the sight of olives, not to mention eating them, and the consumption took, well, quite a while.

But we were not convinced, and early on Saturday we charged the tree and started picking fruit. We spread large sheets under the tree and used two methods. First, we beat the branches – vigorously, but not ferociously – with Chad’s martial art bamboo swords. Much of the fruit fell to the ground while the branches remained intact. Then, we went over the branches and hand-picked what was left.

That took about three hours.

Then, we had to start sorting the olives; there is a certain fly who stings them and leaves a worm inside the pit. So, we looked for tiny imperfections to examine whether they were fly bites. That took four hours and we hadn’t finished by the time the sun set. Gaaaaah! One really learns to appreciate olives after such hard work.

Then, at home, Chad took half the amount of olives and “broke” them. Syrian olives are wonderful when they are cracked; there are various methods to do it, and his enterprising engineer nature led him to use our citrus juicer.

Now, all our olives are happily soaking in water, and will be pickled tomorrow. This is what our bathroom looks like:

What you can’t see in the picture is the large bucket of cracked olives, fermenting.
More updates in the following days!

Sauerkraut Mystery Partially Solved

Our Chubeza delivery this week included more cabbage. We do like cabbage, honestly we do; my dad’s family has Polish roots, and Chad comes from a Mennonite family. And cabbage rolls are a staple of Mennonite cooking. And we like cabbage with tomato sauce, and we like slaw. But there was just too much of it for one week. So, we decided on sauerkraut. But we had no clue how to do it. We turned to two dependable sources of information: my grandparents and the internet.

Now, apparently, this is not very easy, and Faith Petric‘s song describes the process in a deceivingly easy way. In her song, while cleaning the fridge, she comes across a strange substance:

Look at this, it’s sauerkraut, now when did we have sauerkraut?
Whatever this stuff was, it sure is sauerkraut by now!

My grandparents, after a lengthy interrogation, confessed, that they don’t do any fermentation at all. They just stick the cabbage in a pot of vinegar. Now that won’t do. The internet resources, on the other hand, were less candid, and more vague and mysterious. “Large ceramic pots” in the garage were described, a process of removing some foam, daily, under a gauze, was mentioned, and the whole process was described very unappetizingly. Naaaah, we said, we won’t go there.

Then, Shari Ansky‘s book came to the rescue, and we modified the recipe there to include more stuff we liked. And after five days of just standing in our porch, it came out delicious. And here is how we did it.

The one essential tool for this enterprise is a large glass jar that closes hermetically, with rubber, like the one you see above in the picture.

You’ll need:
3 celery stalks
A nice head of green cabbage, cut into quarters or smaller pieces
4 red spicy chiles
4 bay leaves
black pepper, unground, to taste

Chop the celery stalks into pieces that fit on the bottom of the jar, and put them there. Then, pack the jar, very tightly, with cabbage pieces, chiles, bay leaves and pepper. Finally, pour into the jar salt water (1 tsp salt to 1 cup water) until the liquid covers the veg. Leave in a lit, sunny spot for five days. Voila.